Wednesday, November 17, 2010

Warp Speed


Things are moving really quickly at the house...or so it seems anyway. I feel like I am making 15 decisions daily, and each decision is now one that will be seen in our home every day. It makes things a bit more daunting from a decision making perspective as shooting from the hip or making rash decisions can be dangerous. More then anything else I think its harder to walk the line between choosing to re-do something that has been done incorrectly (or not right according to what I thought would look right) and going with the flow and finding a happy medium that will work with what has been done, and what was thought to be done. Above is an example of going with the flow. This is a shot of the wall tile in the master shower. It wasnt originally supposed to be two tiles wide for the glass tile that runs down the middle of the tile. However, there was a "mis-communication" between me and the tile guy. He heard me say center it on the wall, when I had said center it on the spout and control valve of the shower. Well, my decision came down to ripping out all of the tile that had been installed "incorrectly" or doubling the amount of glass tile on that wall. Thankfully we had enough and it was in keeping with the style that I am looking for that doubling it up made sense. This way the tile guy didnt have to do a ton of extra work taking it apart, and I get to keep some semblance of the design I wanted.


The kitchen tile work is essentially done, with the exception of a little bit of grouting on the back splash for the vent hood. This is a deail of window opening from the hallway into the kitchen. I had the tile guy put two tiles in the actual space to define where we will be putting the glass insets. I chose to use 1/2" shatterproof tempered glass in this space so there will be no chance of anyone of the kids putting themselves through it if they happened to trip and fall going up the stairs.


Take one last look. This is it, today the stairs will begin to be trimmed out, and they will never look the same. It seems like its been a thousand years since there were no stairs here, and then even the "temporary" stairs that you see here. I will say I am glad that we have waited this long to do the trim on these stairs as they have been beaten up pretty badly in the last three months. Now the problem is going to be keeping them nice once I get them trimmed and then finished this week. I am going to be spending a good deal of time over the weekend getting protective layers down on the floor to do everything we can to avoid any mishaps.


This is the thermostat for the heating in the bathroom floors. When we are all done these will be set and ready to roll at 65-70 degrees all the time. The girls wont ever have to deal with getting out of the bath onto a cold tile floor anymore!


These are accent lights that cant go in until after the drywall is done. I had 9 of these installed in three different places around the house, and they are going to end up being exactly what we want. These lights are gimbaled so Iwill be able to point them at whatever items I am hoping to get a highlight on. One of the main places that I wanted this is on the wall where the TV will be going. This is mainly because TV tends to look better with a light behind it - and its less of a strain on your eyes.


Its hard to make out this color exactly, but this is the color Astor chose for her room. Its a pretty light colored purple on the card that she chose....not as much in person. Its quite a vibrant color in preson, and I am sure that Astor is going to love it.

Stairs are going in right now. Siding is going up on the garage along with soffits and gutters. Quite a few major changes happening in the next day or two. Going to try to get some pictures at lunch today in the daylight so the exterior work can be seen.

Friday, November 12, 2010

Progress on Many Fronts


Things are moving right along at the house. Because so many things are finishing up, its hard to have everyone there working all the time. As a result, I am struggling to get everyone scheduled in a way that allows for the work to be completed in full. Everything seems to be 85% of the way done. At this point we are down to finishes. The tile is going to be a few more days, the painting begins tomorrow, and the wood floors have to be sanded and finished (later next week). On top of that all of that we still have to finish all of the custom work, put in the light fixtures, install all the bathroom vanities and clean up and stain the cement floor in the basement. Lots to do, and its going to be hard to get this finished by the end of the month with the holiday in the middle of all of that.


Here is a shot of the kitchen as it stands now. The 3rd piece of counter top did go in yesterday, and it looks exactly the way I was hoping it might. The tile contractor also got a good amount of the back splash tile in yesterday too. You can see that I chose to use a different tile behind where the vent hood and stove will go. I wanted to try and break up that space a little bit, and it seemed that using a different tile would help do that in combination with the stainless steel appliances that will go there.


The generator is about 75% of the way installed at this point. People's gas is out today connecting the gas line and putting in a meter which should allow me the electrician and plumber to connect the generator to the home's infrastructure. I also had to go out and buy a car battery for this thing as it has to have a way to self start when something goes wrong with Comed's service and it has to kick on. This generator will do a self check 2 times a month to ensure that it works and to give the battery a charge so it doesn't run out of juice. The generator has an automatic system that we will program so it will run at a certain time for each self check - ideally not late at night or early in the morning as I understand its not quiet....


Here is the finished patio area. The forms between the pads of cement have not been taken out yet, but when they are this will be the finished product. You can also see that the windows have been put in the garage and its Tyveked and ready to be sided (which will start on Monday). I am going to be putting some light fixtures on this north wall space to illuminate the patio area. I hope that this will make this the perfect outdoor living space for day or night. It will be nice to have a space that we want to use outdoors for eating and relaxing.


The fence is finally progressing. There have been some fits and starts with the contractor who is doing this work, but I think we might finally be on track to get his work done. I have to say that I think this fence is going to come out almost exactly the way I wanted it to look originally. Now I just need to figure out the best material to put on the ground for the dog run as that's the purpose of this area.

More updates to come this weekend as painting happens, and I get some cleaning done around the space.

Wednesday, November 10, 2010

Confounded Darkness


Lets just say that I am really having a hard time adjusting my photography schedule to the new hours of that its light during the day. I have been so used to getting home, checking in with the family, and running over to the house to take a few pictures before it gets dark. Well......that's not really working out very well for a bunch of the pictures I would like to take (fence, patio, garage). The good news is there are plenty of working lights in the house which is allowing me a modicum amount of pictures.


What is that on the openings? Doors! Funny how that sounds, but its true, after 4 months, there are finally doors on all of the rooms again. That also means that the whole house has trim as well. All of the windows and doors are finished, as well as the baseboard in the whole house. We chose to use a very simple trim, and we are not doing any crown molding at all. I will be much happier with this when the doors and trim are painted as everything it dusty and dirty (and primed yellow) that make things look just a bit off. Don't get me wrong, its a welcome change, I would just like to get all the way to the end result.


I don't think I have talked about this door at all. This is the the only interior door in the entire first floor. One of the main reasons we chose a sliding door here was because it was on such a high traffic area in the hallway to the basement where we will be coming and going constantly. So I decided if we put a sliding door on there it would be less likely that someone got hit with the door, or have to constantly be closing it (opening in wasnt an option with the small size of the bathroom) to keep it out of the way. I ended up purchasing this door from the sliding door company, and while expensive, its a really nice door that works just as it should. I think its the perfect touch for a tiny little powder room, and should help keep it from feeling any smaller then it already is.


This is a very yellow picture of the tile in the master bathroom. Unfortunately the light in here wasnt very good so I wasnt able to get a good picture of just what this tile looks like which is actually white with some silver and gray in it. What you can see from this is: the tile is a 6x24 porcelain and is being laid in a similar "stacked" manner as the girls bathroom, and we have put down floor heating product below the tile. I am pretty happy to have the latter, especially with this bathroom having two exterior walls and the likeliness that these floors will be cold in the winter without the heating element. Its one of the little things in the house that I am really looking forward to.


Last but not least is the progress in the kitchen. As I mentioned a few days ago, we changed our mind on what we were going to use for hte back splash and decided to go with 2x8 white porcelain tile in the kitchen throughout. We are about halfway through the installation of that tile and I really like the look we are getting. Its not going to help the kitchen feel any better, but I think its going to end up right in step with the finishes in the rest of the kitchen. Once the appliances and rest of the counter tops are in, it should look great.

Mostly tile work and some exterior work being done on the house this week. Painting will begin this weekend, and we will be doing a lot of the finishing work like installing bathroom vanities and such next week as well.

Sunday, November 7, 2010

The Little Things


Its easy to look past the little things in the house. The things that at one point seemed to be the most important decision of the day/week, now an afterthought. I was in the house cleaning up today and was thinking about all of the little things that have to be buttoned up in order for this house to end up working efficiently. Whats funny is I think that keeping in front of these little things are what tend to keep me ahead of the curve - for the most part.


The radiant heat is something that I feel like I spent a whole month on back when we were building the infrastructure of the house. The above two pictures are of the manifold that will be the control valve for the water flowing into the radian tubes. The four tubes from the floor connect to the manifold, and the manifold will connect to the combined heating source for the water.

In the case of how to provide the heated water for the radiant system, we chose to use a double use water heater. This will be a 75 gallon water heater that has a separate coil built into the bottom half of the water heater. Inside this separate coil is the water for the radiant tubes. What happens is the water heater automatically heats the water in the radiant coil as a result of keeping the water in the tank warm. Because its very difficult to drain even half a 75 gallon tank with a small house like ours, the coil being in the bottom half should keep the temperature fluctuation in radiant tubing from being too bad - this being the major drawback to this system..you could see some temperature variation. It should be fine, and it makes the most sense from an economical and energy efficiency standpoint.


The panel. Its very fun to photograph, with lots of colors and angles. Its also the hub for all of the power in the whole house. When you look at it closely, its hard to make heads or tails of all the wires and connections. What I do know is that the color of the wire being used relates to what area of the house it was being used in. I most cases a main room or switch will have 5-6 different color wires running through it. Pretty interesting process. Its something that seems so difficult looking at it from the outside and is fairly simple to do when you have the knowledge. Its truly a tradesman that is an electrician.


This isn't so much about the details as much as its about cleaning up the cabinets and making it look the way it should when its done. I decided to take a few swiffer wipes over there to get the static-y dust and grime that had accumulated on the cabinet doors. Poof, the kitchen looks as it should - pristine and new. I am really looking forward to having the floors sanded and finished and the cabinets cleaned....should be exactly what I was hoping for.


Who says there aren't plenty of hard working people out there in this world? The roofers showed up on Sunday to do the roof. I love it. They started work around 9.30am this morning and were finished with the roof by 3pm. I know its not hardest roof in the world, but I just enjoy the fact that someone else is as crazy as I am. As with the house, we chose architectural black shingles and we added a ridge vent for this (there were not vents on the house due to the spray foam) garage to release the heat that will inevitably build in the summers.

Hopefully the siding will be delivered tomorrow morning and the guys can get started on that. I got the Tyvek and other items....I will just have to bring the windows over from the basement of my house so they can put them in.

Cement patio goes in tomorrow, meetings with garage door guy, shower glass & mirror guy, and the architects are coming by to see the house for the first time in a few weeks. Going to be a busy day around the house.

Saturday, November 6, 2010

So Many Things, So Little Time


Its been a few days since I have posted, and in that time quite a bit has been done around the house. Most important of these is the installation of two of the three counter top pieces. As seen above, we have chosen to use CaesarStone counter top as our counter top material for this kitchen. CaesarStone is a manufactured stone counter top that is made of pulverized quartz. Essentially they pulverize the quartz and then reconstitute it to make a solid color counter top. The adhesive agent they use to get the quartz to stick together also makes it stain resistant (but sensitive to heat). Therefore, the color we chose is Pure White, which is essentially solid white. We are confident in the product's ability to stand up to time from a stain resistance standpoint so it will be quite interesting to see how this will go over the long term as we beat on it.


Here is the kitchen with the two slabs installed. We had to take the doors off the sink cabinet as they were not cut properly by the installers (shocker). We chose to have an under mount sink, and a stainless steel farm sink with a single bowl at that. Its pretty simple and refined if you ask me. We looked at quite a few different sinks and in the end we kept coming back to the farm sink. I am really happy with the clean simple lines on the sink in combination with the counter tops and the cabinet colors. I really cant wait to see the who thing assembled with all of the other items (stove, fridge, lights, and back splash) installed. It should look really good.


Here is a shot of the edge I chose for the counter top. We have a half bull nose edge on the granite in our house now and while I like it, it is not ideal for the more contemporary design of the new house. So, I chose to go with a very simple beveled edge on the counter top. There are not a ton of soft corners and edges in the house, so this should be a good way to tie everything together in the kitchen. This shot also gives you a good idea about the junction of the counter and sink in the front as well. We really wanted the counter top to be over mounted on the sink and I am quite happy we did it this way with just the jutted out portion of the sink not covered by the counter top.


Dual purpose shot here. You can see the window openings that have been cut into the garage now that the rough construction on it is complete. I know it might seem like a lot of windows, but I already owned these windows, so they were going in the garage. The other purpose of the shot is to show the patio area that has been prepped to have cement poured on Monday. We are having a sidewalk poured all the way from the back of the property, past the garage entrance door, and right to the basement entrance of the house. From there we will be laying different sized pads of cement from that sidewalk all the way to the east property line where they will be a 10' x 3' pad laid for a grill enclosure (and maybe a smoker) to be built in the spring. We will be leaving some spaces between the pads of concrete where I will put in some pea gravel. This is being done to allow water to run off under these pads and keep the area from flooding.

With the combination of the windows, the high walls of the deck, and the cement patio with the grill, I am hoping the area between the deck and the garage can have a courtyard feel where we can sit outside and enjoy the warm summers. If things work the way I want next spring, I would like to put a pergola over a portion of the space to further define the area as an outdoor living space.


This is the impromptu tile wall. Originally I purchased this tile for the back splash in the kitchen, but I didn't like how dark this tile ended up looking with dark grout - conceptually, I it wasn't actually installed. We were going to use dark grout as white grout doesn't work very well with a high use kitchen. So, out with the glass tile, and in with the white subway tile in the kitchen. Since I owned this (and it couldn't be returned - which I knew when I bought it) it made sense to put this on the wall in the powder room. As it turns out, it looks pretty good, and should really brighten up that tiny little room.


The trim boards, all dressed up and ready to go. This is what we are going to be using around the windows and on the baseboards. This is just flat "1-by" trim. There will be 4" high trim boards on the baseboards, and 2" trim around the doors and windows with no crown molding at all. We chose to go with the simple and clean design and tried to stay away from the gilded look of crown or detailed molding. It is going to take the carpenter the better part of the week to get this all installed. I really want to see the way the do the trim around the windows as it just doesn't seem to be obvious they way they are going to make it all level.


This is the door choice. Its just primed right now, but these are going to be painted white to match the trim in the house. This door is a new style from Masonite. My original plan was to just go with the slab door, but I really liked this new style. Its simple and straightforward, but has a bit of design to it. The funny thing is there is only one door in the first floor, and we are not using this style of door for that door (on the powder room). These doors will be used in the second floor and basement.


The fence is finally progressing. The steel guy who is building this has been ill and having transportation problems since getting all of the posts in the week we agreed to do the fence. The steel has come up with a good idea to use longer boards to make the fence look more uniform. The ones you see above are the "test" boards that he was putting up to show me what its going to look like. He is now treating all of the boards with a cedar deck stain, and then he will be mounting the boards as such. Ironically, I was never 100% sure that we were on the same page design-wise, but we agreed on the basic materials and colors, and it was just a matter of which way the boards were mounted. This is the way that I wanted it to look.


Here is an example of what the finish carpenter is doing in the house. This is a storage area in the main room of the basement. Its going to be handy for all of the stuff a play area should have stored. The carpenter will be doing this, a bench in the mudroom, a bookshelf in the first floor, a bookshelf in the master bedroom, and the front and back doors. So far his craftsmanship looks to be what I was hoping it would be. He is as patient a builder I have seen on the job so far.

Last but not least, the guest shower. This is tile that we have in our house currently, and this makes up the entire shower (floors, ceilings, and walls) in the guest shower. This is all of the tile we are going to be doing in the basement bathroom since we have the heated cement floors in the whole basement. Now its just going to be a matte of getting the heat to the right temperature and finishing the floors in the bathroom with something that will keep you from slipping all over the place on a wet cement floor.

Cement, electrical, finishing the counter tops, finishing the tile, doing all of the trim and doors, siding and roofing the garage, sizing the garage door, measuring for all of the custom glass in the house, choosing the lighting for the garage, designing the back fence, getting the awnings up are all on the agenda for next week. Going to be super busy week coming up.

Thursday, November 4, 2010

Carpentry 101


2 days. That's all it took for these 3 guys to put this much of the garage up. 4 more hours tomorrow and it will be ready to have roofing and siding put on. I have been impressed through this whole process with the carpenter's work. They are efficient, refuse to cut corners, and Richard is constantly thinking of ways to reduce unnecessary costs in the construction (and re-construction) of the house. The garage is no exception. In this case he made several suggestions to figure out ways to eliminate the steel beams that the plans called for.

There he is, the man, the myth, the polish whirling dervish...Richard finishing up a day on the job getting the garage close to finished. I will say this....the garage is HUGE. I honestly didn't anticipate it being this big. Now that I am seeing it fully constructed I am happy we are doing it at this size and secretly hoping the siding and black roof will make it look just a bit smaller (funny how that works). It will also look a lot smaller once we get the windows into the house as well.


Here is the interior of the garage. This is not a camera trick...it really looks this big in person to. We made the ceilings at 9'6" to allow us plenty of space for a large garage door and plenty of overhead storage if necessary. In the ceiling you can see the double LVL supports that are carrying the floor load for the attic space and some of the weight of the roof eventually. We are going to be able to put this garage to good use, and it truly will be the storage for the house as we have taken most of that out of the house. We are going to be putting in a 30" x 60" "trapdoor" attic ladder that we can use to move things in and out of the attic. On top of that I am going to install an industrial pulley in the attic space to allow me to hoist larger items into the space without the awkwardness of trying to push it up a ladder. Should be interesting that first time I go to pull anything up there on the pully....


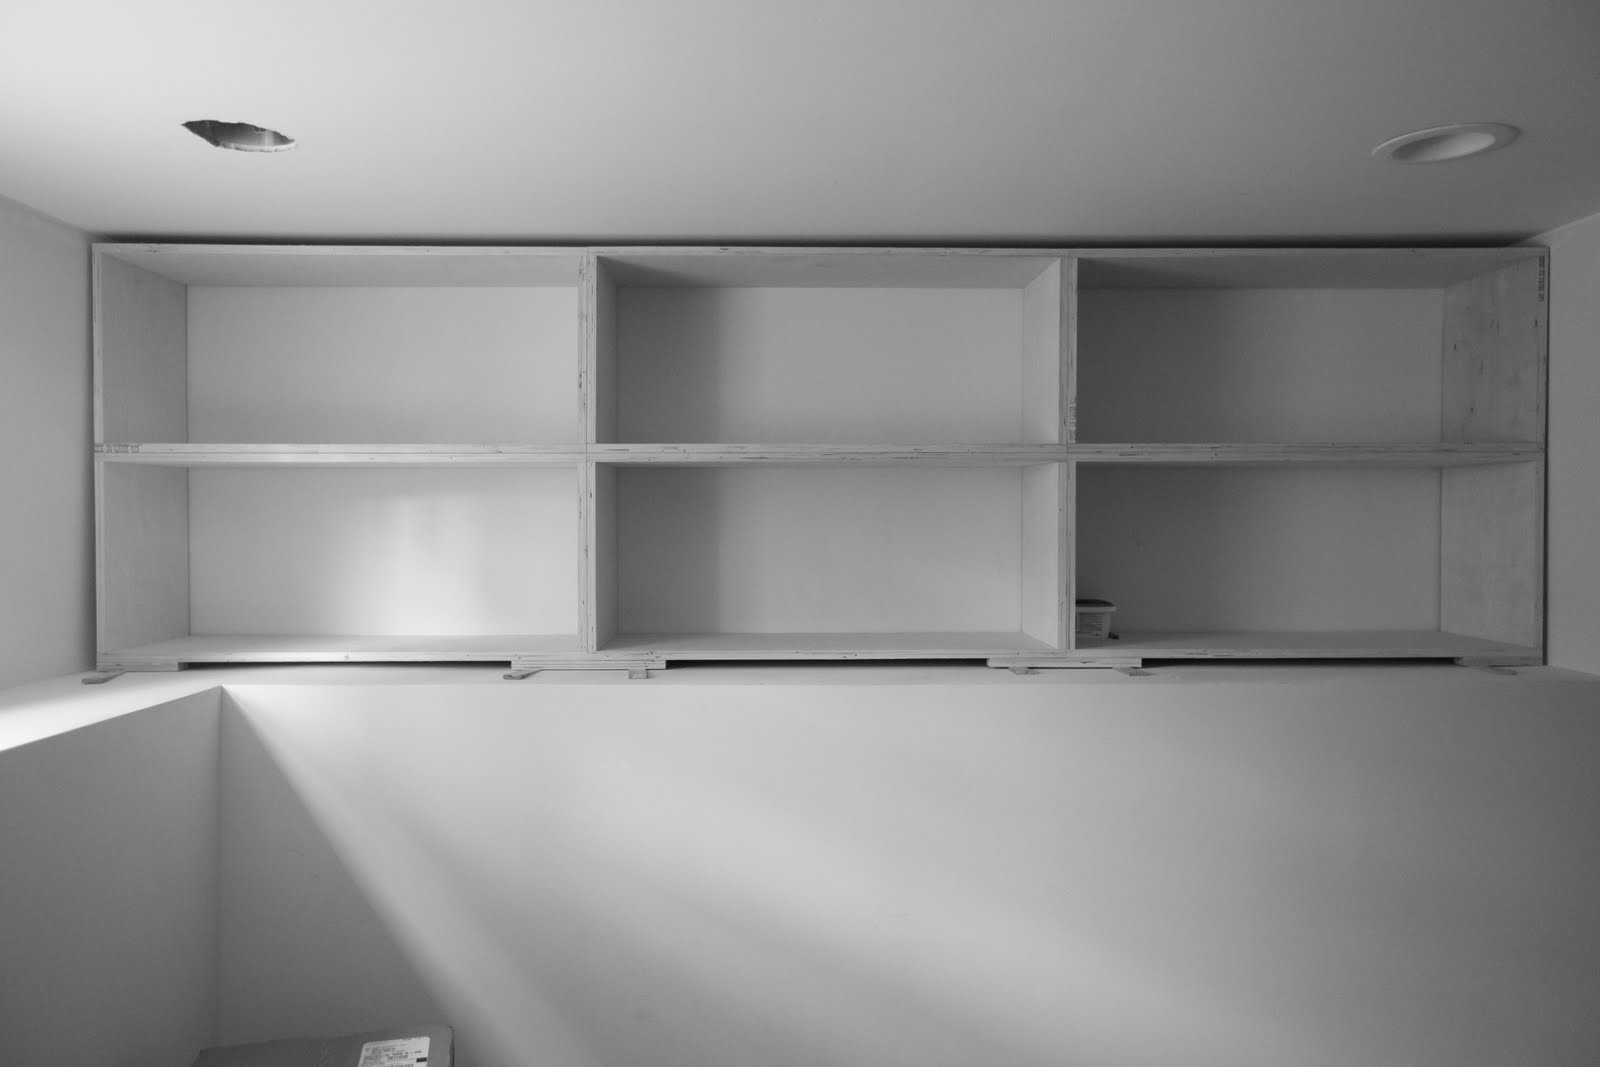
Power! A few spots in the house have full power right now. The electrician had to connect each spot individually to make sure all the different wiring worked. We are waiting on Comed to come out to inspect the electrical service (hopefully today). Once they do that, they will be sending a truck out to hang a new line that provides 200amp service as opposed to the current line which only provides 120amp service - which will not power the whole house. The shelving you see on the floor being built are the bookshelves that are going in the basement and the first floor. My friend's Gene and Mike are good carpenters and will be doing all of the finish carpentry in the house....this includes the front and back doors as well as some more shelving and storage in our bedroom. I am positive its going to look great when its done.


I am still waiting on someone to come up with this product (other then people that already know). I have had a few guesses and have not heard the right one yet. I think we will be getting to this late next week, so things will finally be settled at that point and the cat will be out of the bag. I am going to let the subject rest for now - mainly since I don't have anymore ways to take photo's of this abstractly.

Big day tomorrow. Kitchen counter tops go in, the garage is finished and all of the doors and window trim will be delivered tomorrow morning....also the fancy tile for the bathroom was delivered so we can begin on that. Assuming I get some time when its light out I will try to detail whats going on in the shower in the basement and the wall in the first floor bathroom. So much to do, so little time.

Monday, November 1, 2010

Garage Pad Complete


There it is....after all this time we finally have the template for a garage. And in just a shade under a decade no less. What you see is 18 cubic yards of cement goodness that makes up the thickened edges (for support) and the 5" sloped center of the garage floor. It took two full cement trucks to make this floor / foundation. It was pretty interesting to watch the two mason's slogging around in their work boots (not rubber boots) working the cement to all of the spaces of the forms, and then eventually smoothing it into its finished form.


Here you can see some of the finishing work the mason's do when they get all of the cement into to place and worked out. They work the cement into thickened edges, and insert bolts (shaped like and L under the cement) that will be mounted into the ledger board and then subsequently screwed down. This helps driver the force and weight of the garage into the foundation and helping the walls to stay connected to the cement. I think I am going to enjoy watching the guys build this from scratch as its the way that a structure is supposed to built, not just cobbling an old house back together.


The trench. Two high school kids (son of the electrician and friend) spent the better part of the morning excavating this trench so gas and electric can be run to the garage (and gas to the grill later). This is the only way you can run gas to the garage, whereas electric can run up in the air if you want. Since we are already running gas to the exterior for the generator, it was a no brainer to run it out to the garage (maybe heat down the road?) and then on to the area where we will put the outdoor grill next year.


Another abstract picture to bait everyone. The installation of this is going to be delayed somewhat as a result of my misunderstanding about how readily available the counter top product we are using is. As a result, we will have counter tops later this week....

Electrician, Fence, Plumber, Tiler, and finish carpenter all at the house tomorrow.....BUSY