Monday, January 10, 2011

The Back Door


What feels like the last piece to the puzzle was installed yesterday. I know its really not the last piece being all of the landscaping needs to be dealt with in the spring, but it sure feels like it. Now that both doors are in there is a bit of a sense of completion in the house. I have to say, its a pretty nice feeling.....


Here is the back door in all its glory. Not a ton different here then the front door from a style standpoint, but quite a bit from a usefullness perspective. So this door, as you can see, has four windows instead of six. We did this because I wanted to get as much light as possible into the mudroom area with it having very little natural light. I have to say that we were successful in donig that. When I was home yesterday for lunch and the sun was out (unlike today) it was evident the space was getting a lot of light.


This gives you a little bit better idea the kind of light that can filter through the windows during the daytime. As with the glass in the front doors, this is made with dual pane reinforced shatterproof tempered glass that is inset in a way to prevent it being kicked out easily. This was a pre-requisite for us with the back door here. Also like the front door, the door is constructed of solid poplar and is almost 2" thick. We had to feel like the house was going to be safe from that sort of break in.


Here is a shot of the back of the house at night now that its been fully finsished. I neglected to turn on the lights surrounding the sliding door on the first floor, but this is pretty representative of what the house will look like at night from the back. I am quite happy with the way it turned out. When we originally put this together with the architects, I was worried the space on the west side (left side) of the back would look too empty and unbalanced with the one window on the upper story. I don't think thats the case now that things are done, and I am convinced that it would have looked fine I hadn't added the window in the master bath.


I realized I never put up a picture of the front door from the outside so I ran around the front last night to get a quick shot. The front isnt quite as finished as I would like (broken glass bottom on the porch light, unfinished front trim board, unfinished painting on the porch) but I am happy that the door profile did what I wanted for the house - made an old dutch colonial home look more contemporary without changing the actual structure of the home.


Sunday, January 9, 2011

The Front Door


The saying goes "good things come to those who wait." In the case of the front door, I can unequivocally say that this is case. Gene and Mike finished the front door on Friday, and it could not have come out any better then it did. Above is a shot of the inside of the door where the windows meet the bottom mount on the inside for the exterior handle.


Here is the door in all its glory. The design came from an image of a door that was somewhat like this which I found on the web when I was just looking around. I really wanted something solid, black, and something that had enough windows to let light in; but not so many windows that we would be exposing ourselves to any theft risk. Once I found the image, I sent it to Gene who priced it out and confirmed he could indeed build something similar. This is the finished product. While this doesn't look exactly like the one that I found; I think its a better version of that door. The door is made of solid pieces of poplar that were notched and glued to form the main frame and insets of the door. Its a really solid and incredibly heavy door.


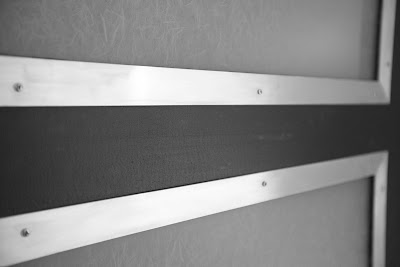
One of the main differences between the template and this door - the aluminum trim around the windows. This was not on the original design. This trim is only on the inside of the door, and is there to keep the glass insets in place and keep them from being kicked in if someone tried. The glass insets were done by a glass vendor gene knows, and were custom made just for this door. They are double thick and insulated to keep any of the exterior elements outside. What isn't pictured on any of these shots - the rice paper treatment to the windows that keep the outsiders from peeking in on the house. It was something I had purchased for the girls bathroom window to help obscure things to the outside, and it ended up working out very well.

The back door looks similar and will be going in on Monday. At that point we will be down to touch up painting and building a dog gate for the mudroom. We received our Flor tiles via UPS on Friday and those should be going in once we get things figured out with the dogs.

Wednesday, January 5, 2011

2nd Floor Tour

Once again I am going to let the pictures tell the story here. One small note: the front and back doors will be going on the house tomorrow! The house is nearing completion - until the spring when its time to clean up the exterior.


Monday, January 3, 2011

The First Floor

I am not going to say much about these and just let the pictures speak for themselves. Suffice it to say that the first floor is pretty much setup. All we are waiting on is the new front door which should be done this week. Enjoy.


Tuesday, December 28, 2010

Limbo

I know, its been a long time since I have put something up, but I have good reasons. Really, I do. I have been waiting for a few things to be taken care of with the city and the bank that required me to be a bit quiet about the fact that we have moved in. It seems a bit silly, but if I went into the details of how this process has gone all the way along, it would make more sense. If you add in the circumstances surrounding the carpenters, we have really been in limbo these last few weeks, and just trying to work through getting each room put together as best as we can. Just in the last few days we have been able to get a few of the lingering pieces put together so we could finish these rooms. Its been a major challenge.


What I love about this picture is that its going to be a background if photos of the kids for years to come. I am excited about the prospect of that. Its somewhat hard to tell in this shot, but the accent wall has been completely finished and has a very high gloss white paint on it. The painter used a type of paint that is used on cars and gives off a very high shine. Its really become an art installation with the amount of time and effort that went into putting this up.


Here is a shot of the finished bookshelf on the first floor. I couldnt be happier with it. As you can see at the bottom of the picture, the dogs have claimed the space between the two chairs as theirs. Whats funny about this is we had a pile of books in the room next to this under the tv that looked like it was going to be 30% then would fit in the shelves. When all was said and done we ended up having a bit of unused shelf space. Thats good news to me as it means we can continue reading books and not have to worry where we are going to start storing them next.

I am hoping to post a whole litany of photos this weekend. We are still working on getting the front an back doors replaced, getting the final electrical items cleaned up, and getting some paint up on the last few spaces where its needed.


Wednesday, December 15, 2010

The Big Day


Here we are, the day of reckoning for the house. Its pretty much done, and we are moving in one way or the other : ) I haven't dedicated a ton of time to this space for the last few days as I was working pretty hard to get the house in shape to be moved into. We officially started moving stuff over last night, and its nice to see the house with stuff in it. Its easy for it to look small and hard to utilize when there is nothing in the house. The above picture is of my second favorite light fixture in the house - the scotch light. They were ridiculously expensive, but they are proving to be exactly what I hoped - very dense but bright lights for the stairway.


Wider shot of the first floor before the final coat of paint went on the fancy wall yesterday. I am going to regret taking pictures of the house empty, but I think its been well documented enough that I can remember what it looks like.


Shot of the unpainted bookshelves and the fancy wall before the final coat of paint. Our kitchen table and chairs are in the background.


The finished stairway going into the basement. I am really happy with the way the second round of the handrails came out.


The steel guys did a great job stripping all of the paint off the handrail and polishing it to a finished steel look. They look SO much better then they did a week ago. Its exactly what I was thinking of when I originally envisioned this.

I just want to take a brief second to extend my deepest sympathies to the family and friends of Nick Figaro. Nick died very suddenly yesterday morning leaving a wife and young daughter to carry on his legacy. Nick was an acquaintance of mine and a very close friend of both carpenters Gene and Mike (building the bookshelves) as well as several of my other close friends. He will be sorely missed in this world. He was a kind person who meant well with everything he did and its really sad to think he is no longer around. Rest in Peace Nick.

Friday, December 10, 2010

Postponement


I just love taking pictures of this. Its just so pretty and unusual. I was over at the house yesterday afternoon doing some work and noticed that people were stopping on the sidewalk to look in the house - you can see the wall at night since there arent blinds on the windows yet. I am just glad to have our painter Verchelino working on this wall. He was able to do a lot of touch up work on the wall yesterday filling holes and sanding spots where the drywallers were unable to get it done. I have to say, where I have seen some of these other walls installed, I am really not sure how they got it to look as perfect as they did.....its near impossible. We are giving it a shot, and it looks good, but I can still tell that its 20 individual wall tiles were used to make this wall. I am looking forward to seeing this fully painted with the treatment Verch is using on it. I am sure its going to look awesome, its just going to need a bit more work to get it there.


Here is the massively awesome bookshelf that Gene has been working on for a week or more at the house. This is one of the most important pieces in the whole house, and Gene has built an absolutely beautiful bookshelf. This is not the finished look at all, its going to be finished on the outside with a flat wood trim, and the whole thing will be painted a high gloss white. I got the idea for the bookshelf from a company name Poliform which makes high end stuff sold at the Merch. Mart and Gene has created something that looks incredibly similar. When this is finished its going to be an amazing piece of the home.


Here is a somewhat dark shot of the carpet on the stairs that has been put in over the past few days. I had the idea that I wanted to do carpet tile on the treads only as I dislike the way that carpet rolls over the edge of bullnose hardwood - I think it makes the stairs look bulky, and its not a contemporary look at all. Most contemporary homes you see do not have carpet on the stairs at all - which is not an option for us (its a Jen requirement). As a result, I was looking for a way to still put carpet on the stairs and to eliminate something I wasnt a very big fan of and something help solidify the design concept. I really wanted to used carpet tiles on the treads of the stairs only, but I was having a hard time figuring out how I could secure them in a way that would keep them from peeling up at the edges. My good friend Gaelynn of Edge Design works with Tandus carpets and had a great idea for the way to deal with it - she found an aluminum trim piece that we ended up using to frame out each piece of carpet tile. I am extremely happy with both the look and the feel. I was concerned it was going to look / feel loud and commercial and it feels anything but that. It has a nice soft feel to it, and the aluminum trimming makes the stairs feel thin and very minimalist - exactly what I was going for.


Jack from Jax Glass installed the mirrors on Tuesday and I am just getting around to getting some pictures of them up. We chose to go with basic beveled edge mirrors that have back mounts as we couldnt afford the fancy backlit mirrors. I am really happy with the results, and as before, Jack did a great job with both quality of the cut / bevel, and the installation. We also used this type of mirror for the girls bathroom and the powder room.


Last up for today is the pendants that went in over the peninsula in the kitchen. These have been a bit of saga as I ordered the wrong wattage (who knew that anyone would sell a random German 277 volt item to someone in the US?) and having to have those go back to get the right wattage in there. Well, they are in, and despite the need for a replacement bulb right away - they look good and are the right amount of light for the space. These two pendants may be the lights I had the most trouble with from a decision making standpoint. I was having a very hard time finding a light that I thought would provide enough light to the space (this is where the kids will innevitably eat breakfast every day) and something that was small enough to not obscure the openness of the kitchen. Enter the Tech Lighting Pendant.

Bookshelf, basment floor, and fancy wall are being finished today. Version #2 of the railings is being installed today. Duct cleaning is happening today. Comcast is supposed to show to do their infrastructure install, and blinds are hopefully going to be delivered today for an install tomorrow.

Busy busy busy busy busy.....Oh yeah, we are not moving until next Wed, it just was pushing it too tight tomorrow.